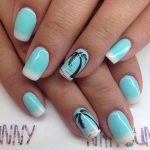
Liquid Sand nail paints are really for those who like to have a little textured and grainy nails rather than the perfect smooth finish of nail paints. They are available in different shades and are pleasing to look at. Their rough and grainy texture is what makes them different from the rest. L’Oreal, Maybelline, and other brands have a good range of this texture. They can be either used alone or can be fused with other nail paints for a mixed look. Here are few nail art designs which can be done using them….
Striping Tape Technique– A base coat in Turquoise can be well seen after the top coat in dark grey is striped of vertically using a strip tape. The lines can be repeated using this technique, if you want multiple lines to be visible.
Pretty Polka’s– A finger in contrast color and polka dots all over looks pretty cute.
AI-generated image created with Microsoft Copilot, December 11, 2025
DIY at home wit these easy steps-
– Clean the nails and remove any other color from the nails.
– Now put a base coat of your favorite shade.
– Be quick and keep the sand handy, now sprinkle the sand over the painted nail, make sure that you do it right after you apply the color, otherwise it will dry up and would not take the sand particles.
– Let the sand and the nail paint dry completely.
– Now you have two choices, if you want the grains of the sand visible, then apply a coat of transparent nail lacquer. In this case, you should also make sure that you don’t overdo the sand particles, you should just do it slightly, for the nail paint to show from beneath.
– Secondly, you can put the top coat of the same color as your base color for a matte grainy touch, as in the picture. But remember to do it when the base coat and the sand dries out completely otherwise everything will become messy. In this case you can cover the entire nail with sand though.


