You don’t have to book an appointment with the parlor everytime for nail art, they can also be done at home with these simple DIY tricks using household items.
Creating Dots– Many nail art designs have dotted patterns, as they are the easiest patterns to develop and are quick to do.
But you cannot achieve a perfect pattern free hand, for this you need tools, but who needs the professional ones when you have so many items lying at home. Use tip of pen and pencils, bobby pins, head pins etc for creating different size of dots.
.
Create matte effect using cornstarch– Sometimes we wish that our favorite nail paint shade in gloss was also available in a matte shade. But do not worry this trick will turn your gloss paint into a matte one, that too with just a pinch of corn starch.
Use tape for creating different patterns– Thin and thick tape stripes can be really useful in creating different nail art designs. You can create zig zag patterns, clear lines and divider lines from tape stripes.
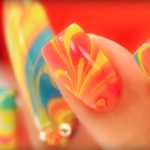
Plastic Wrap– A piece of plastic wrap can be useful in creating amazing nail art designs. Create instant marbled nails by using different nail paint shades, or create a crack effect using two shades of nails paint.
Use sponge to create a shaded texture– Did you know that sponge or foam can be really useful in creating a ombre effect for nails. Put a base shade on nails and then choose a color for gradient effect, put both the shades on a surface and gently mix the color with the help of a toothpick. Now take the foam, press it gently over the color and dap to the nails. Don’t forget to put the top coat of transparent nail color for finish.
Net for nail art– Net creates a nice honeycomb effect on nails, mix it with ombre nails or just create a two tone effect with it.


